Pop the hood on a neglected daily driver and you'll usually find a layer of road grime, oil haze, and dust cooked onto every surface by heat cycles. It looks bad, and plenty of owners decide the fix is a garden hose and a bottle of degreaser sprayed with enthusiasm. That's exactly how a clean-looking engine bay turns into a car that won't start, throws a check-engine light, or develops a rough idle that a shop can't diagnose because nothing is mechanically wrong—water just got somewhere it shouldn't have. Engine bay detailing done correctly is less about scrubbing power and more about controlling where liquid goes, what it touches, and how long it sits there. The risk isn't cleaning the engine; it's cleaning it carelessly.
Why engines bays are riskier than they look
Modern engine compartments are dense with exposed electrical connectors, open-air mass airflow sensors, alternators with unsealed vents, and plastic components that have spent years absorbing heat from the block and exhaust. None of this was designed to be blasted with a pressure washer. Connectors that look sealed often aren't fully weatherproof; they're designed to shed the occasional splash from driving in rain, not a direct stream of water and detergent forced in under pressure. When moisture gets into a connector and the terminals corrode, the failure might not show up immediately—it can appear weeks later as an intermittent electrical gremlin that's maddening to trace back to a detailing session.
Heat-soaked plastics are a separate problem. Intake ducting, wiring conduit, and engine covers that have been baking under hood heat for years are often more brittle than they look. Aggressive scrubbing, degreasers with high solvent content, or even just flexing a stiff hose to reach a tight spot can crack a decade-old plastic clip or duct that would have been fine if left alone. This is the core tension in engine bay detailing: the things making the engine look dirty—old oil residue, sun-baked grime—are often bonded to surfaces that have also become more fragile with age. Cleaning them well and cleaning them safely pull in slightly different directions, and the whole job is about finding the point where both are satisfied.
Prep work that prevents the actual damage
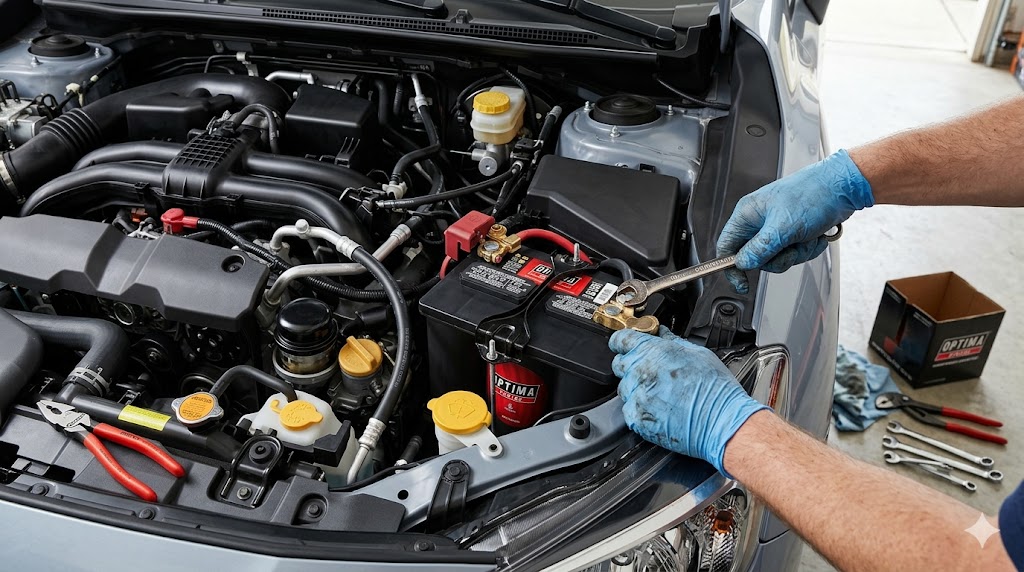
The single highest-leverage step in this whole process happens before you spray anything: covering and disconnecting. Pull the negative battery terminal, or at minimum cover the battery and its terminals with a plastic bag secured with a rubber band. Bag the air intake opening, the alternator, and any connector you can identify as exposed—this typically includes ignition coil plugs, oxygen sensor connectors, and the mass airflow sensor housing if your intake tract has an accessible one. Plastic bags and painter's tape are unglamorous, but they're doing the real work of damage prevention; everything after this is comparatively low-risk once the vulnerable components are isolated.
It's worth taking a phone photo of the bay before you start covering things up. Engine bays have more hidden connectors than people expect, and a reference photo helps you confirm everything got reconnected properly afterward, especially if you're new to your particular engine layout. If you're not confident identifying which components are sensitive, a quick look at your vehicle's service information or a forum thread for your specific model is worth the ten minutes—engine layouts vary enough that generic advice can miss a sensor placement that's unusual for your car.
Choosing degreaser and application method over raw pressure
Pressure is the enemy here, not the tool you'd expect to reach for. A pump sprayer or a garden hose on a gentle shower setting will do more controlled cleaning than a pressure washer, which can force water past seals that were never rated for concentrated jets. If you do use a pressure washer, keep the nozzle on a wide fan pattern, maintain real distance from the surface, and never aim directly into a connector, the alternator, or the base of the windshield where water can migrate toward the cabin's ventilation intake.
Degreaser choice matters more than most people assume. Citrus-based or water-dilutable degreasers are gentler on rubber hoses, wiring insulation, and plastic than heavy solvent-based industrial degreasers, which can dry out and eventually crack rubber components with repeated use over the life of the car. Apply degreaser to a cool engine—never one that's just been driven—both because hot metal can flash-evaporate product before it has time to work and because thermal shock from cold liquid hitting a hot exhaust manifold or turbo housing is a real risk to those components. Let the degreaser dwell for the time stated on the product, agitate stubborn grime with a soft detailing brush rather than a stiff scrub brush, and rinse from a distance rather than up close.
Rinsing and drying without reintroducing risk
Rinsing is where a lot of the earlier prep work either pays off or gets undone. Work top to bottom and rinse in the same gentle, low-pressure manner you used to apply the degreaser, checking that runoff is moving away from connectors rather than pooling around them. Resist the urge to rinse twice as hard because the first pass didn't look clean enough; a second round of light rinsing and more brush agitation is safer than escalating pressure.
After rinsing, drying matters more in engine bay detailing than almost anywhere else on the car. A leaf blower or a can of compressed air is genuinely useful here—not for cosmetic reasons, but to force water out of connector housings, crevices, and the underside of components where it would otherwise sit and slowly work into places you can't see. Then start the engine and let it idle for several minutes before removing your covers and bags; the heat from a running engine helps evaporate residual moisture from areas your drying pass couldn't fully reach. Only after this idle period should you consider the job structurally finished.
Dressing plastics and finishing without creating new problems
The cosmetic finishing step—applying a protectant or dressing to plastic covers, trim, and hoses—is where people undo their own careful work. Heavy, glossy dressings can attract dust and grime faster than bare plastic, and some solvent-heavy dressings actually accelerate the drying and cracking of aging rubber and plastic over repeated applications. A matte, water-based dressing applied sparingly with a cloth rather than sprayed directly gives a healthy, factory-fresh appearance without leaving surfaces slick or attracting more dirt. Keep dressing off any surface near the drive belts or pulleys, since a slick belt can slip and squeal or, in rarer cases, throw itself off entirely.
It's also worth being honest about the limits of DIY engine cleaning. If your engine bay has visible oil leaks, damaged wiring insulation, or connectors that are already cracked or corroded, cleaning first can actually make diagnosis harder for a mechanic, since a leak's source is easier to trace when it's dirty and fresh than when it's just been degreased. In cases like that, a professional detailer or your mechanic doing the cleaning as part of a diagnostic visit is often the smarter sequence—clean intentionally, not reflexively, especially on a bay with known problems.
Building a maintenance rhythm instead of a one-time deep clean
Engine bays that get attention two or three times a year rarely need aggressive degreasing, because grime hasn't had time to bond and bake through repeated heat cycles. A light wipe-down with a damp microfiber cloth and an occasional dressing refresh keeps things presentable without ever requiring the higher-risk full wash. If you're detailing a neglected bay for the first time, treat that first session as the deep clean and everything after as light maintenance—the second and third cleanings should be noticeably easier and lower-risk than the first, which is a good sign your prep and technique are working rather than a sign you can get more aggressive.
Key Takeaways
- The real risk in engine bay detailing is moisture and pressure reaching electrical connectors and sensors, not the act of cleaning itself.
- Covering the battery, alternator, and exposed connectors before you start is the single most effective damage-prevention step.
- Low-pressure water application with a mild, water-dilutable degreaser cleans effectively while protecting aging rubber and plastic components.
- Thorough drying, including a post-rinse idle period, prevents trapped moisture from causing delayed electrical issues.
- Light, matte, water-based plastic dressings applied sparingly hold up better long-term than heavy glossy products.
- Bottom line: engine bay detailing is safe and worthwhile when you slow down, isolate vulnerable components first, and treat water pressure as something to minimize rather than maximize.